Mountain Navigation
Imagine yourself on a hiking trail walking up to Mt. Whitney, looking around at all the beauty of nature, you bask in the sunlight illuminating all the flora around the solitary trail you walk. From the slope above you hear the distinct whistle of a marmot scampering from one hole to the next feasting on all the wild herbs available. Walking higher the glare catches your eye as the sun reflects off of Consultation Lake, to the west is a vast talus field, your original plan was to hike until you saw the lake, but it’s an amazing, sunny day, why not go exploring off trail? Why not just go a little higher off trail as far as you want, then whenever you decide, you can turn back and walk towards the lake to get back to the trail. You walk higher into the talus cirque above, imagining yourself just as John Muir exploring a new area. Suddenly out of the west past the mountain, clouds start to roll in, a dense fog drops over the area, you hear thunder in the distance. A classic, impromptu Sierra storm is moving closer at an alarming rate, in a moment visibility has vanished and you’re all alone on a talus slope in the alpine.
Many people, including myself, have found themselves in this exact situation (some of them multiple times.) The usual fallback for many is to pull out there brand new InReach device and call for help. However, there are plenty of steps to take before relying on others to get yourself out of a jam, and the best solve to this situation is using your navigational skills to find the trail in as little time as possible to get yourself back to the safety of your car.
These days, many mountain travelers rely on their GPS as the “ace in the hole,” to tell them where to go in the mountains, (I myself am guilty of only having a GPS unit as my sole form of navigation in zero visibility) but GPS units are not full proof! They can die, they can break, and they’re subject to just as much user error as other forms of navigation. In the end sometimes the old map and compass can be the best tools for the job, and being well versed in their use can go miles to making it out alive!
Disclaimer: This article will by no means be inclusive to all the skills of wilderness navigation! Transferring the hard skills required to use a map in compass over text is difficult and may be hard to understand for those with certain learning types. There are full books written about use of map and compass, that are much more in- depth and written by authors that are much more qualified than myself. The best thing you could do to improve wilderness navigation is to take a class taught by a qualified professional!
Reading a topographical map: A lot of the time I don’t need my compass to navigate in the field, if I have a map then I can usually use the landmarks to find my way around. The best example of this is if I’m in a high alpine bowl, if the weather is good and I have good line of sight I can use my map to learn the different landmarks of the area. In the alpine this is usually the different mountains that you can access.
The map below (fig 1) shows an example of “dead reconning,” If I chose to camp in the flat area then I can use the map to identify which mountain I want to climb without using a compass at all because I can look at the topography of the land around me. If I want to climb the mountaineer’s route of Mt. Whitney, then I can walk north from camp and angle to the east when I reach the next bench above me. I don’t need to pull out my compass and take exact bearings because the terrain is so small that I can find my way through it without following specific directions. This sort of navigation is really easy to do in smaller terrain with very identifiable objectives to line the map up with the real world.

Fig 1. Map of Whitney.
Becoming a skilled map reader is a matter of practice and starting with the right kind of map, most maps for mountain navigation are going to be a topographical map. This means it shows the undulations in the terrain by way of contour lines. Every map will have a scale to it, in the lower 48 the most common map scale is 1:24,000. This means that one inch on the map will equal 24,000 in real life, in Canada the most common scale is 1:50,000, so it’s worth taking the time to look at the scale to know how large the terrain can be! The contour lines are directly correlated with this scale, on a 1:24,000 map the common distance between contour lines is 40ft, and every 5th line is marked with the altitude. Where the lines are closer together the terrain is steeper, and the further away they are the terrain is flatter.
There are also color distinctions with map terrain, in general green will mean forest, brown will be upper alpine areas or low deserts, blue is a water body, white is mean glaciers or snow fields. Any other colors added will depict more man-made objects, such as trails, camps sites, urban areas, backcountry outposts, and more.

Fig 2. Features of a topographical map.
Reading a map is like reading another language, map makers use the same types of layouts to mean the same features in real life. If you look at a map of the Sierra and a map of the Karakoram an alpine ridge will appear the same, just with a wildly different scale! Here is a list of some of the more common features you’ll find of mountainous terrain:
A. Pass or saddle- This is a section where there may be a dip in a ridgeline or a connection point between two separate mountains.
B. Summit- These are easily identifiable because it’s where the contour lines end with a circle on top of a mound.
C. Lake- Usually round and always blue.
D. Draw- Where a valley or meadow open up into a larger section.
E. Meadow- A spot of lower elevation surrounded by higher land; the map indicates that there is vegetation in this meadow.
F. Gully or couloir- A space between two mountains that generally isn’t as high angled, this map has a ton of these.
G. Cliff band- The contour lines are super close together indicating a steep section.
H. Alpine bowl- A higher alpine meadow above the tree line and surrounded on three sides, this can also be called a basin.
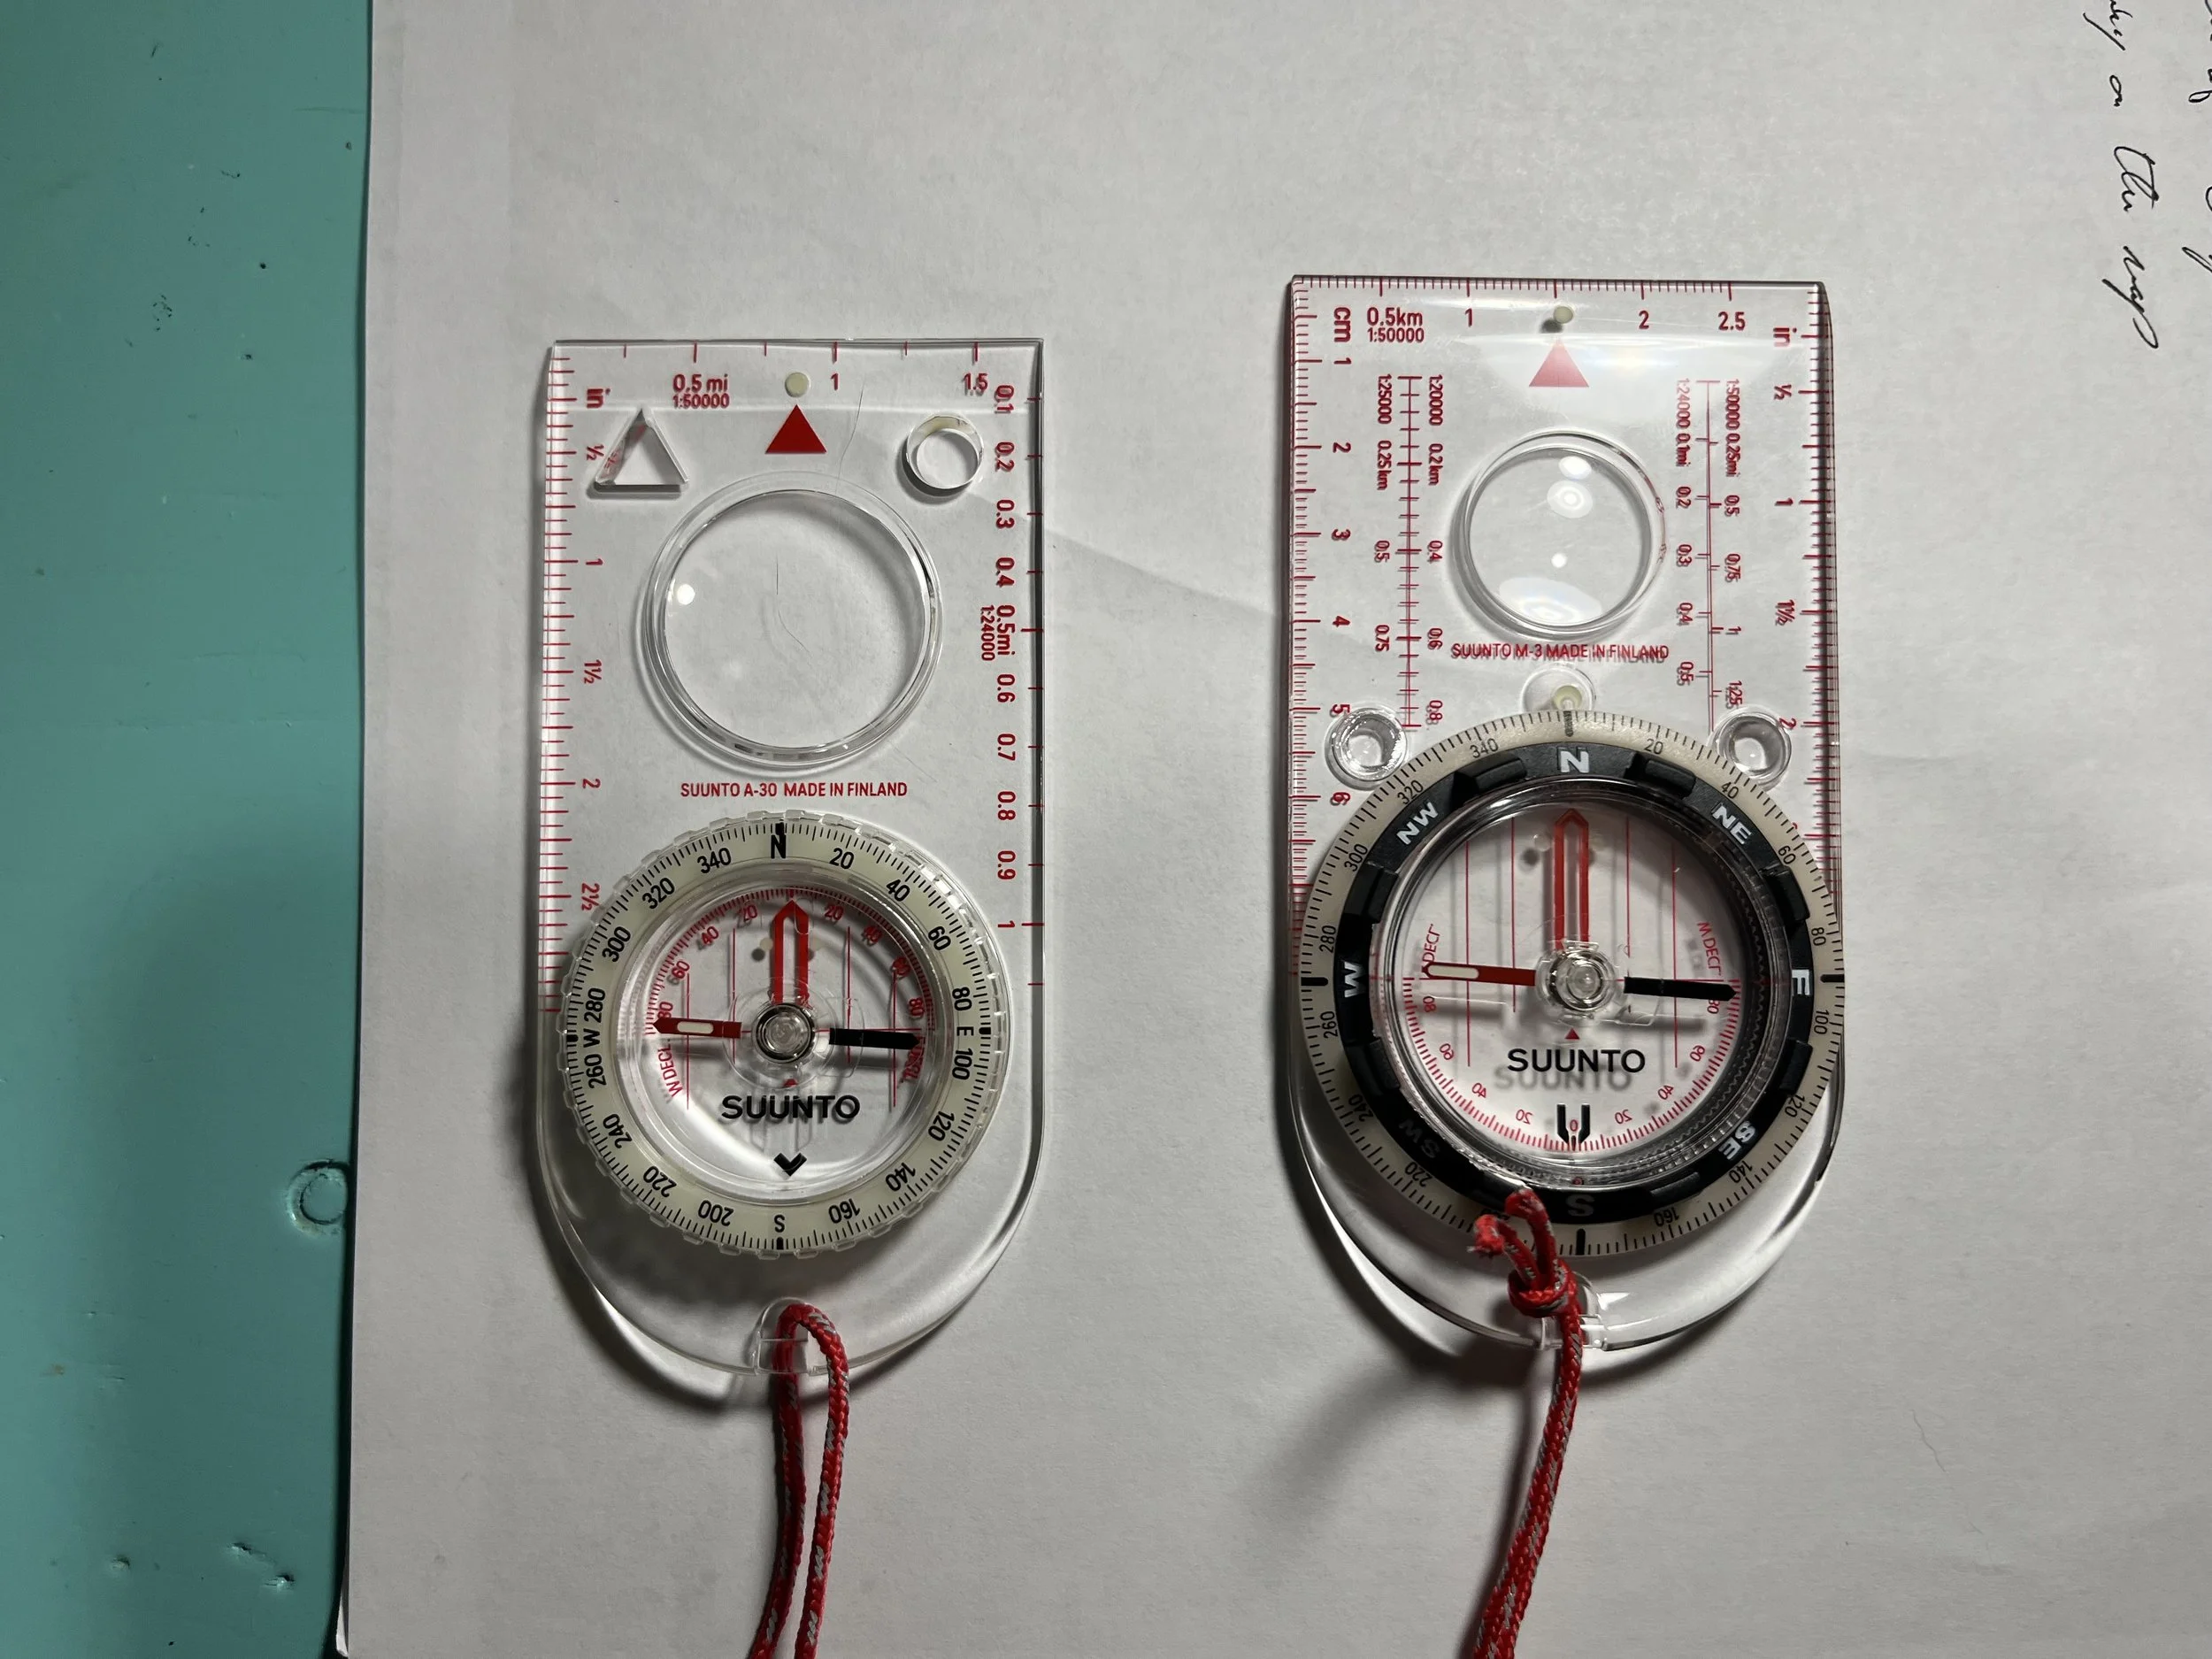
Parts of a Compass: Most compasses have a ton of information ready for those that know how to use them. In general people are familiar with what a compass is used for, it points the user north, just like the compass that is attached to my backpack zipper. While these “toy” compasses can give comfort to folks hiking around on trails, the second you find yourself in an area that has no trail signs and landmarks your five-dollar target compass isn’t going to help you too much!
A good orienteering compass should have everything you need to pair it with a map of the area for proper wilderness navigation. Me personally I look for a number of features with my compass:
- Adjustable declination
- Sighting mirror
- Transparent baseplate
- Having the direction of travel arrow face the same direction as the sighting mirror (some compasses are made the opposite way.)
My personal favorite compass that has all of these features is the Sunnto MC- 2 NH, you could also get the MC-2G if you’re planning to use it all over the globe and not just the northern hemisphere.
Along with these features the wilderness navigator needs to know different parts of their compass in order to work it properly:
A. Red needle that points north
B. Red orienting arrow often called “the shed.”
C. Transparent Baseplate
D. Rotating bezel
E. Orienting lines
F. Declination adjustment
G. Direction of travel arrow
H. Index line

Declination: When navigating short distances being one or two degrees off track isn’t going to get you totally lost, in many cases I may choose to purposely navigate off track to hit a feature to lead me to my final destination. If I’m trying to get myself back to camp in a white out, I may choose to aim higher than my camp to be upstream of a river that runs past my tent. I know that when I get to the river all I have to do is follow it down stream and that’ll lead me back to my camp rather than risking being possibly off and finding myself downhill of my camp. This practice is called “aiming off” and can be very effective.
However, if I find myself in the position of following a direct bearing from my compass, having it be ten or twenty degrees off could send me into the middle of no-man’s-land. This is where Declination comes into play.
Every map has a certain number of features that are printed next to the land projection, one of which is the difference between magnetic north and true north, the compass Rowes on your map always points towards true north and your compass always points to magnetic north. True north is the north pole at the top of the world and is a fixed point, magnetic north is usually somewhere around northern Canada and tends to oscillate in a general area. Declination is accounting for the difference by adjusting your compass to make the needle point towards true north (fig 3). There are parts of the earth where magnetic and true north line up and the declination is zero (on the chart below this would be around Mississippi up to Wisconsin) but many people who do mountain travel don’t tent to live there. Anyone who is on the left (west) side of the zero line has an eastern declination and anyone who lives on the right (east) side of the zero line has a western declination (I know that can be confusing).
All maps will have a way of denoting the declination to the user, Fig 4 shows three examples of the standard symbol most maps come with to show the declination of the area.
This means while shooting a bearing in the field the user has to account for the magnetic declination of their area. If I want to follow a bearing of 110 degrees in Mt. Rainier national park I need to subtract 15.6 degrees from 110 to account for declination. This means I will actually want to follow a bearing of 95 degrees (the 0.6 degrees extra doesn’t matter that much for standard mountain travel, It will matter for ships traveling hundreds of miles in the ocean or planes flying from New York to Hong Kong, but they have more precise instruments to handle their navigation!) Adversely, if I was in Acadia national park and I wanted to follow a bearing of 110 degrees, I would need to add 16.3 degrees. This means I would actually put my compass to 126 degrees to account for the declination.
The phrase to remember here is “East is Least, West is best.” Put in other terms if I have an easterly declination, I need to subtract the number of declination from my bearing, and if I have a western declination I need to add the number of declination to my given bearing.

Fig. 3 – declination across America.

Fig. 4 – Standard Declination images that are printed on many maps
All this math is great and all, but If I’m in the field and don’t want to risk my life based on my mental math skills, there is an easier way around this.
Instead of dealing with the headache, spend 30 extra bucks and buy a compass with adjustable declination. This is a great way to avoid any thinking! The easy way to know if you have a compass with adjustable declination is the declination scale will be on the bottom (south) end of the compass. A compass without adjustable declination will have the declination scale on the top (north) side.
Examples of two difference compasses: Left: a compass without adjustable declination (the declination scale is on the north side of the bezel), right: a compass with adjustable declination (the declination scale is on the south side of the bezel.)
To adjust the declination on a compass that does change, flip the compass over and use the key instrument that comes with the compass to turn the small screw in the back of the compass east or west. Most compasses will have the scale on the back written upside down so when you flip the compass over it appears right side up. If you have a westerly declination of 15 degrees you use the key to turn the arrow to 15 degrees W declination (fig 5).
When you flip the compass back over, you’ll notice that the orienting arrow be pointing off center from the rest of the orienting lines. An easy way to check that you adjusted the orienting arrow the correct way is to put your compass at 0- degrees and make sure the orienting arrow is leaning towards the west or east. After your declination is set your compass is now aligned back to true north coordinates and you don’t have to do any math. This type of compass can be referred to as a “set and forget compass,” and is well worth the money!
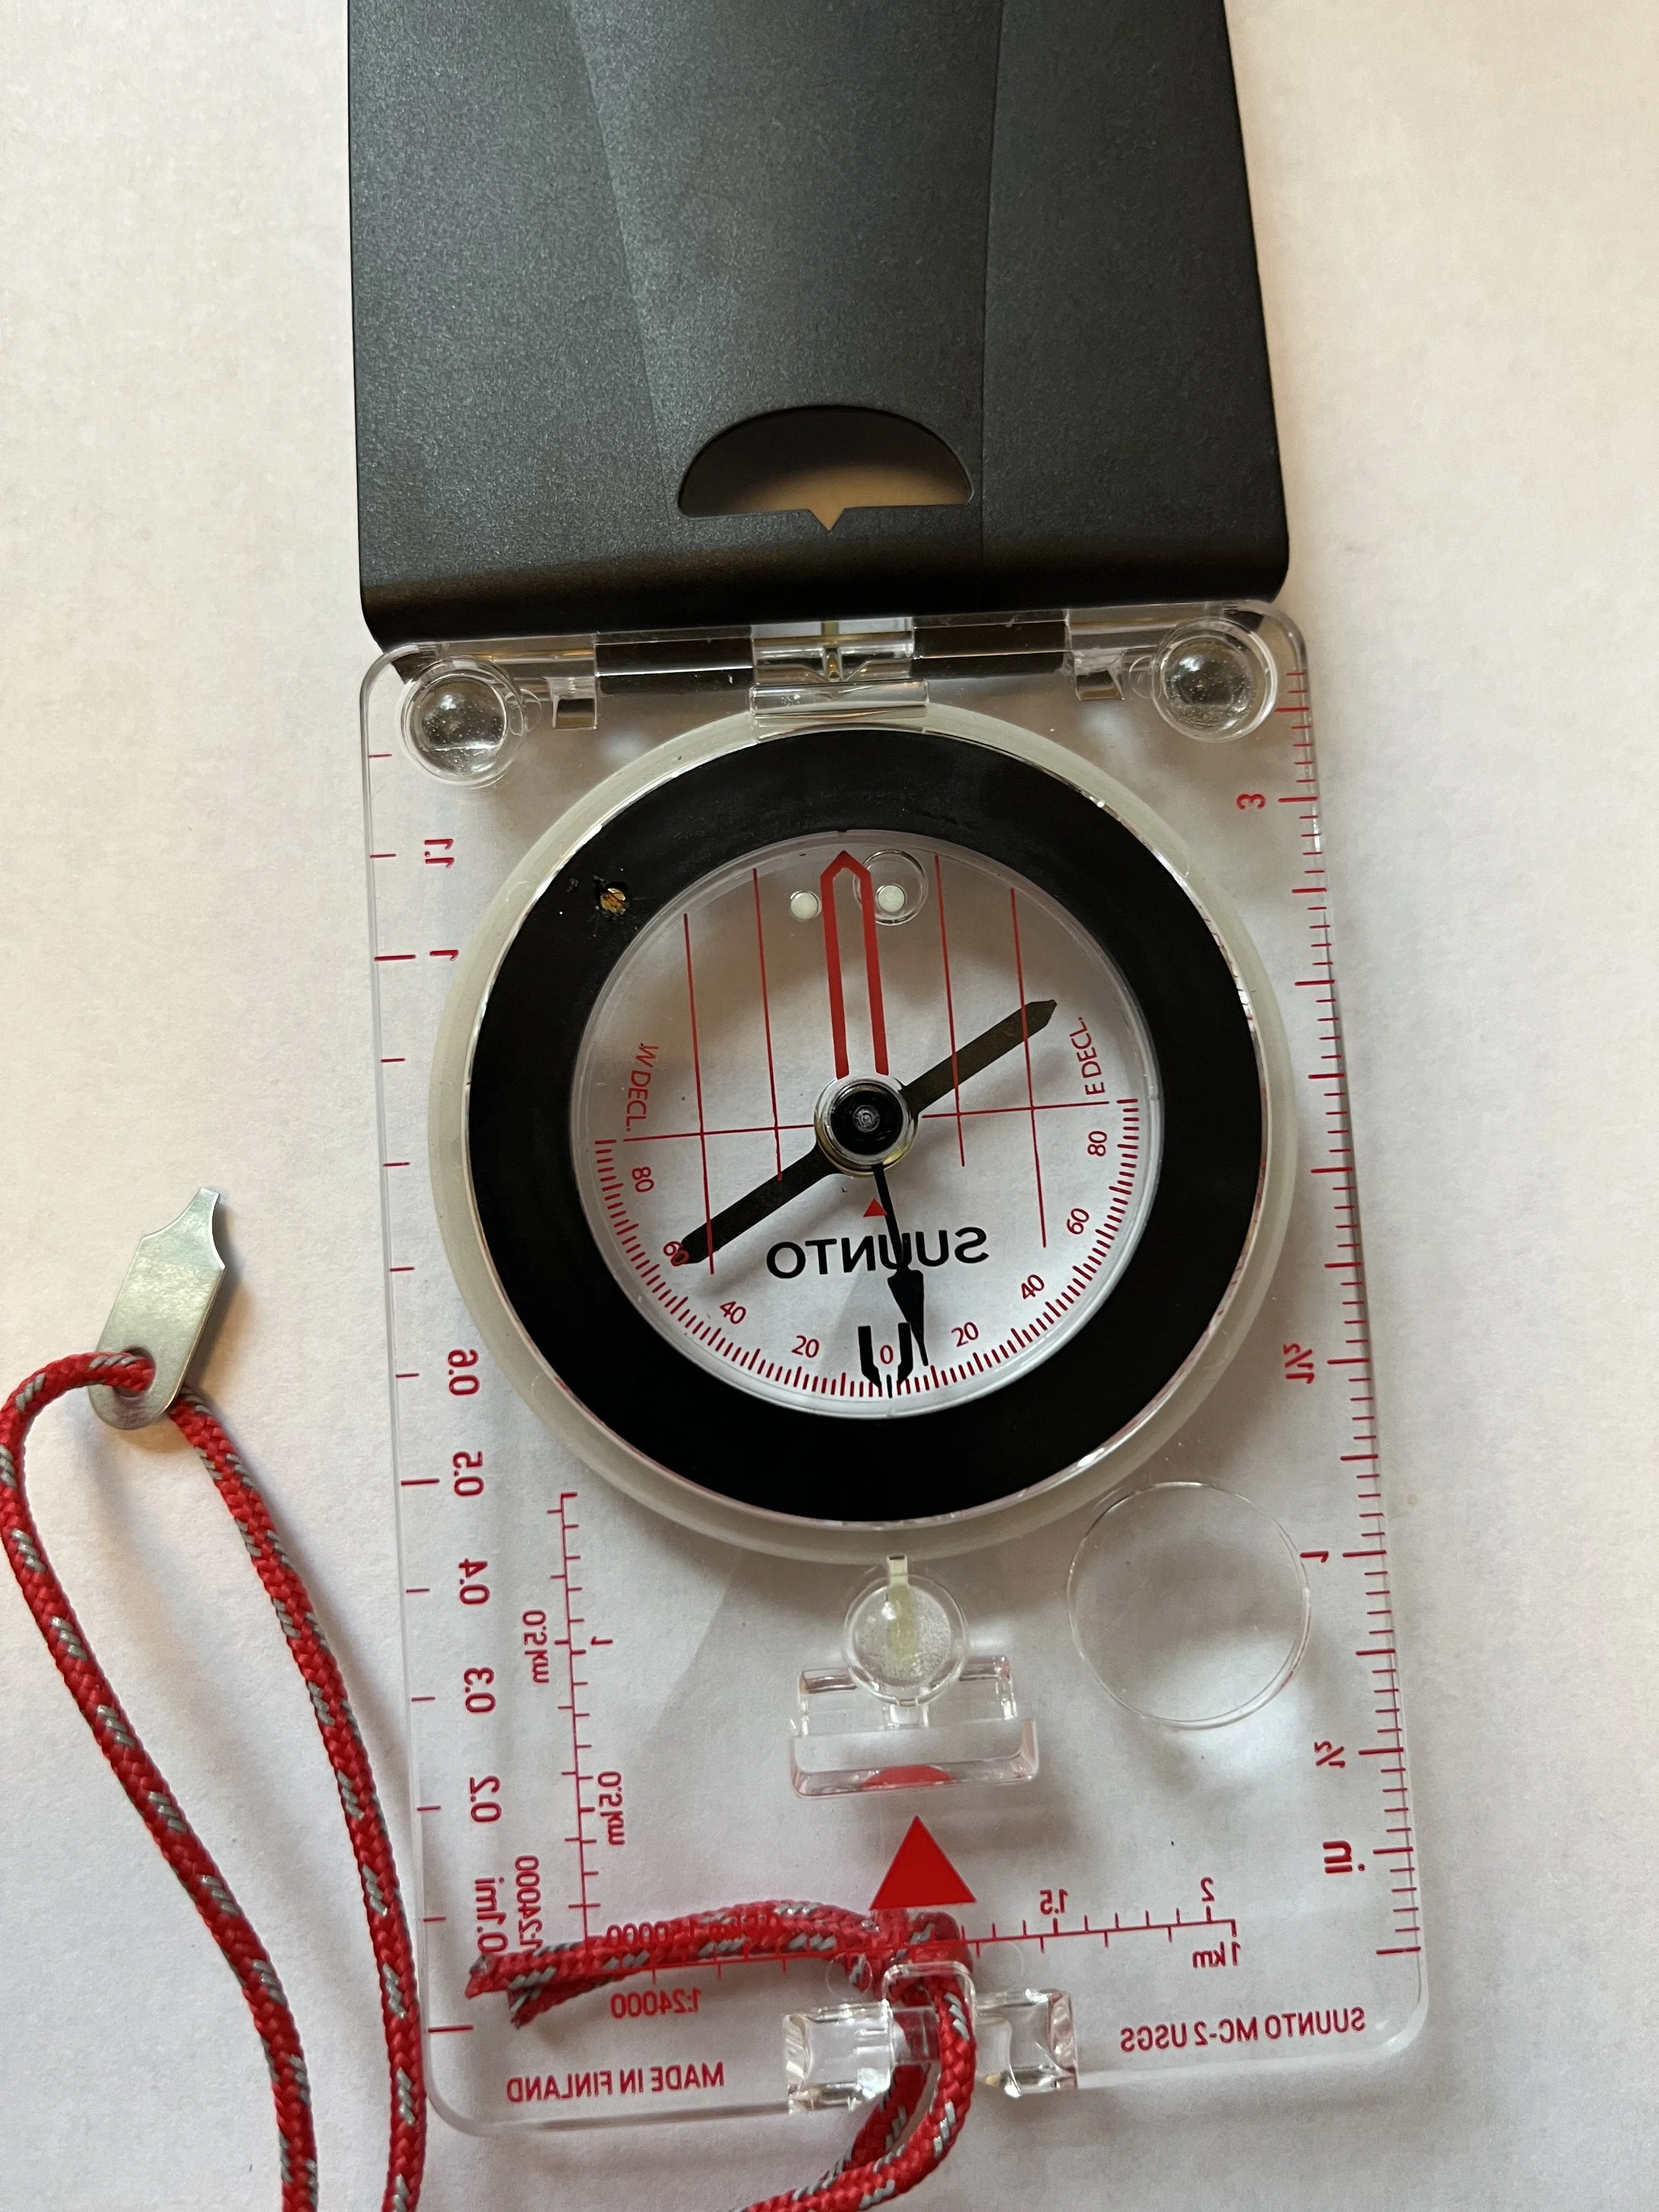
Fig 5. Left: compass with 0-degree declination (to the left is the key that comes with the compass to adjust declination, the adjustment screw is in the left top of the black ring.) Bottom: Compass with 15-degree West declination.
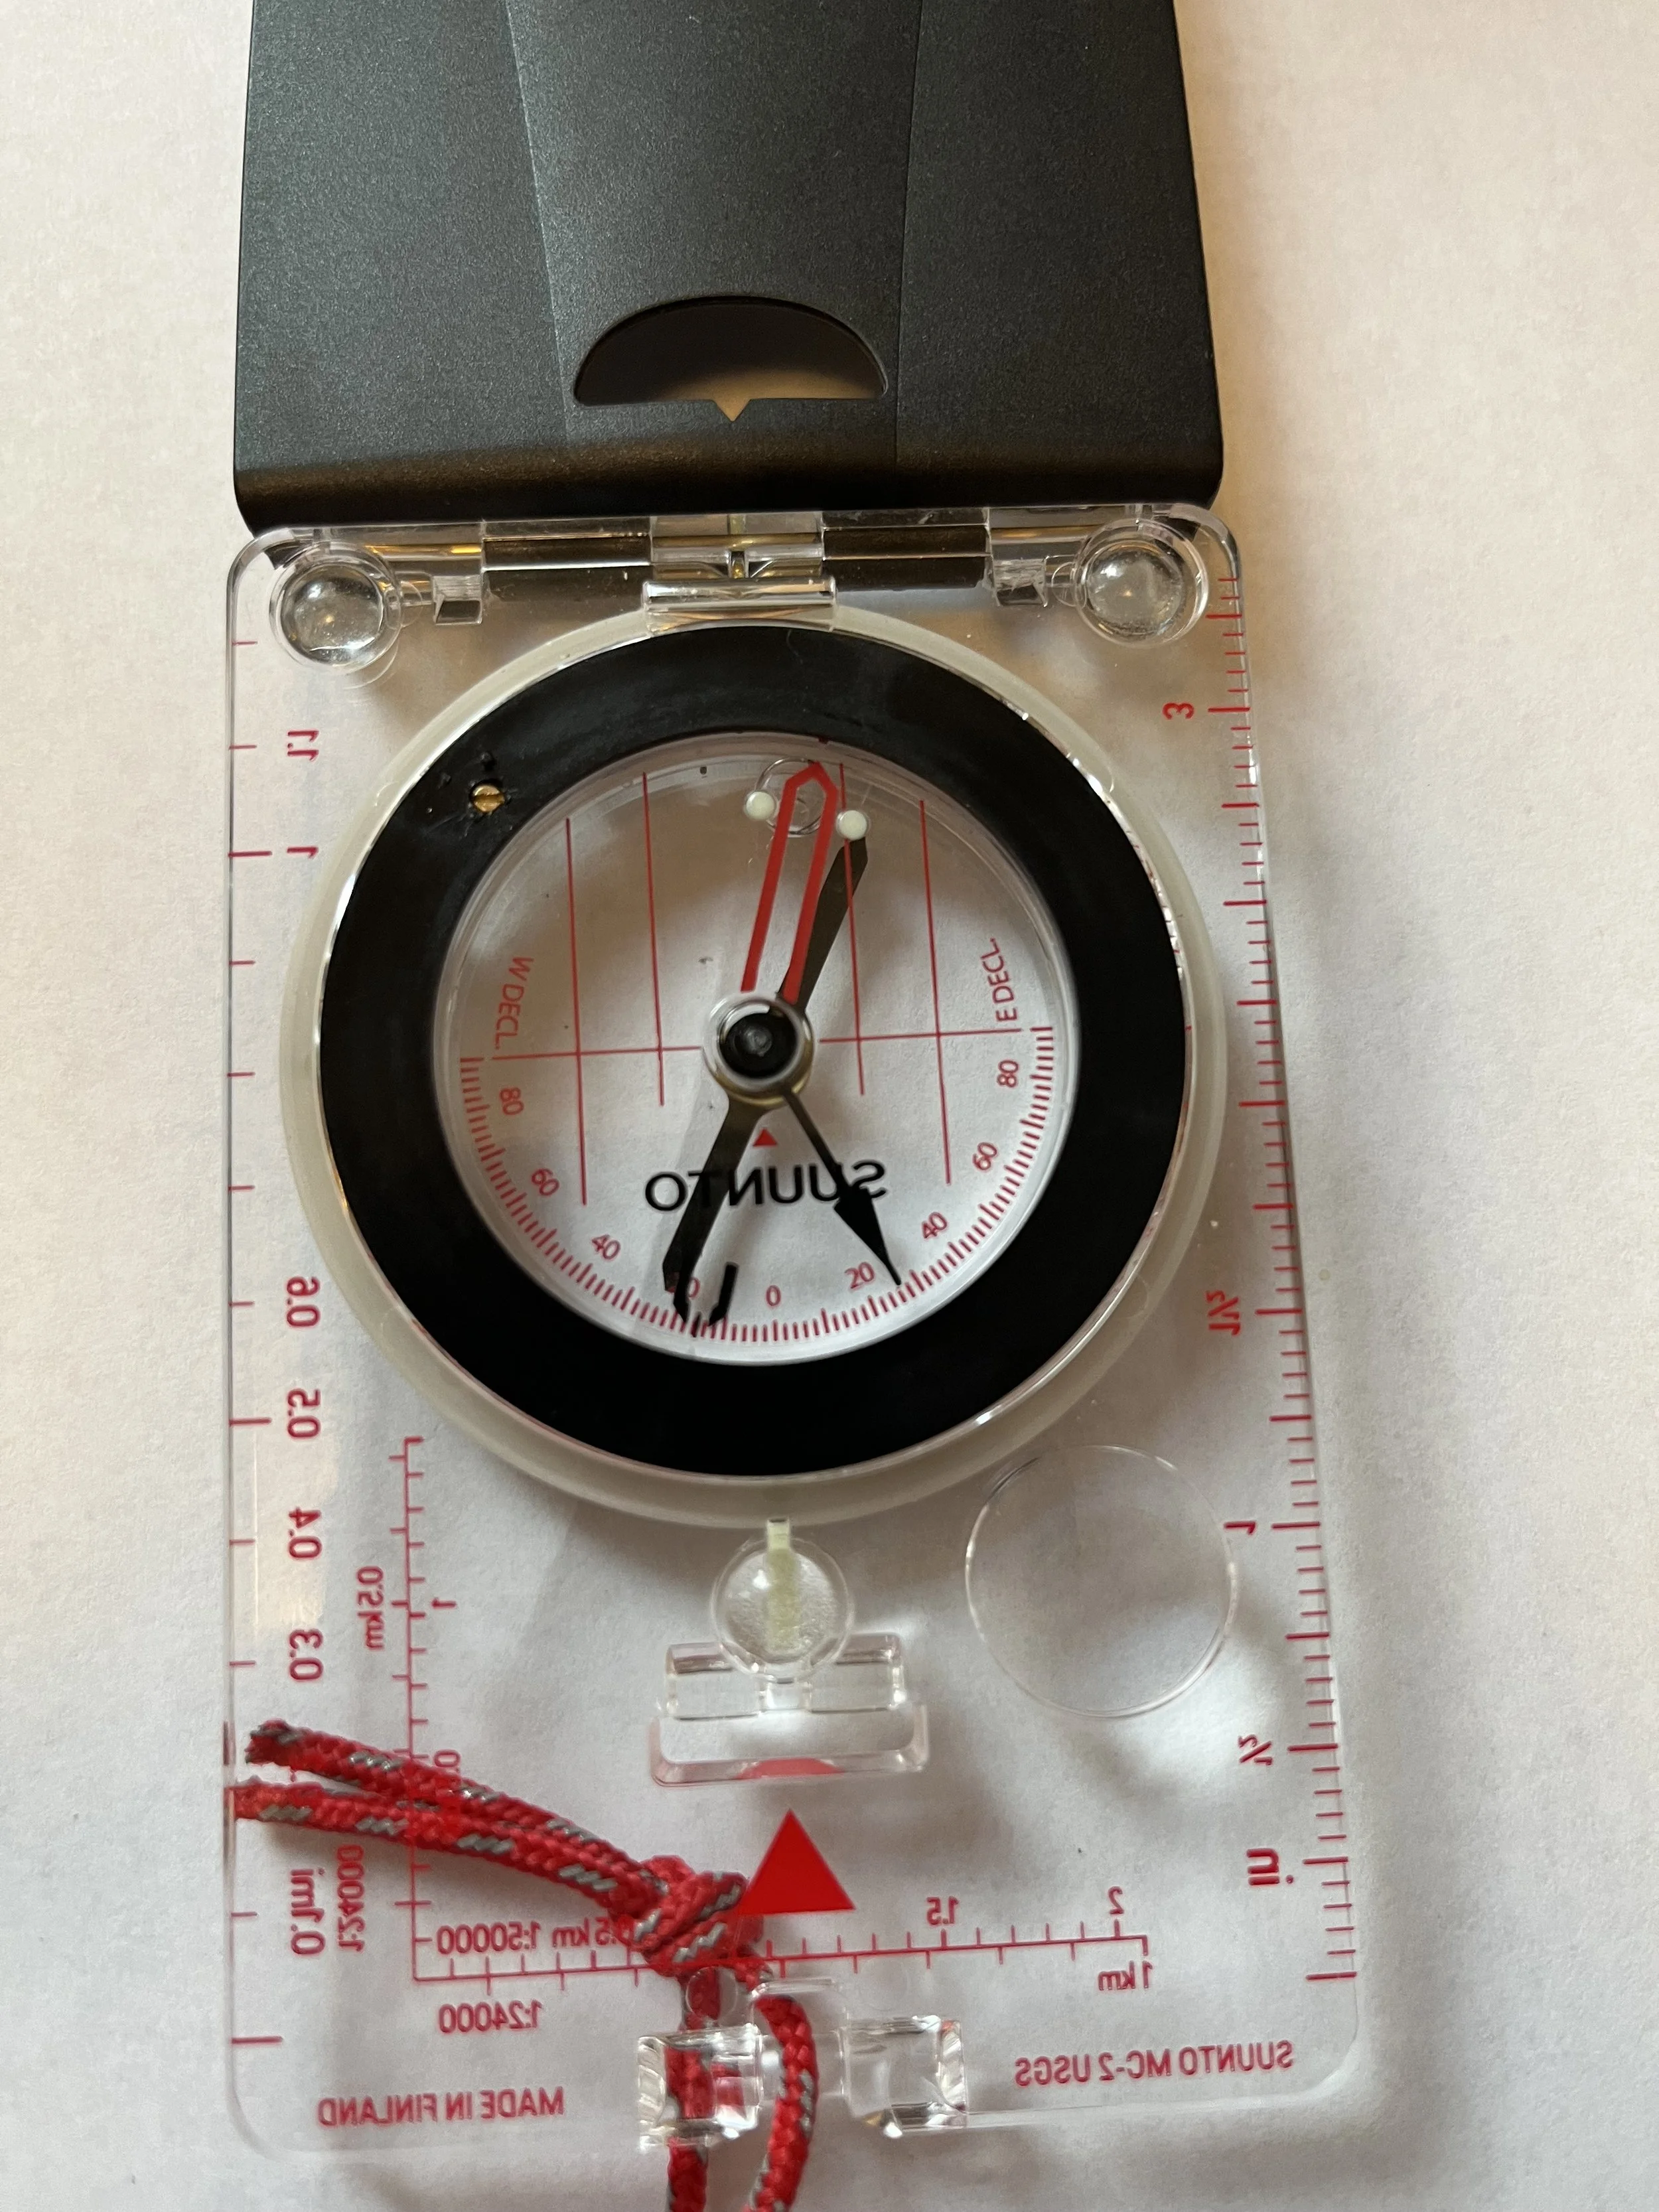
fig. 5.5 - Bottom: Compass with 15-degree West declination.
Shooting a bearing in the field: Now that our compass is fully adjusted for the area we are in, it’s time to actually use it with a map to find our way around! This is when it pays to have a mirror on your compass, which makes it a lot easier to sight the feature you’re shooting. Angle the mirror about 45- degrees from the base of the compass and look through the sighting hole, this allows you to see the feature as well as the bezel of the compass. Turn the bezel until the magnetic arrow is in the outline of orienting arrow (this is also referred to as “red in the shed.”) The number on your index line is your bearing.
Transferring a bearing to the map: Now that you have your bearing let’s focus on transferring that to the map. When you’re in the field this is useful to find your position on the map. In order to find where you are on the map you need to have at least two known landmarks. In the example below (fig. 6) I know I’m somewhere in the circle with the “C” in the middle, by using the map I know that Castle peak is off to my right (I chose to use the circle marked “A” as my sighting point on that peak.) Off to my left is Andesite peak (I chose the very top to shoot my bearing in the circle marked “B.”)

Fig. 6 – Castle peak is “A,” Andesite peak is “B,” and I’m somewhere around circle “C.”
At my position in the valley, I shot “A” as 350- degrees (with a compass adjusted for declination.) To transfer that to the map you place one corner of the compass on the map, the direction of travel arrow should be pointing towards the object you sighted. Rotate the compass until the orienting lines run parallel with the side of your map, then use your pencil to draw a line along side of the compass (fig.7). This gives me one line down the map, and from this I know that I’m somewhere along that line (fig. 8).
Andesite peak was sighted at 278- degrees from my same position, so by moving through the same prosses I now have two intersecting lines (Fig. 9). The point where they intersect is about where I am on the map (Fig. 10). This method is known as triangulation, from here I can use this new location to plot a bearing to get back to the road!

Fig. 7: First bearing off of Castle peak.
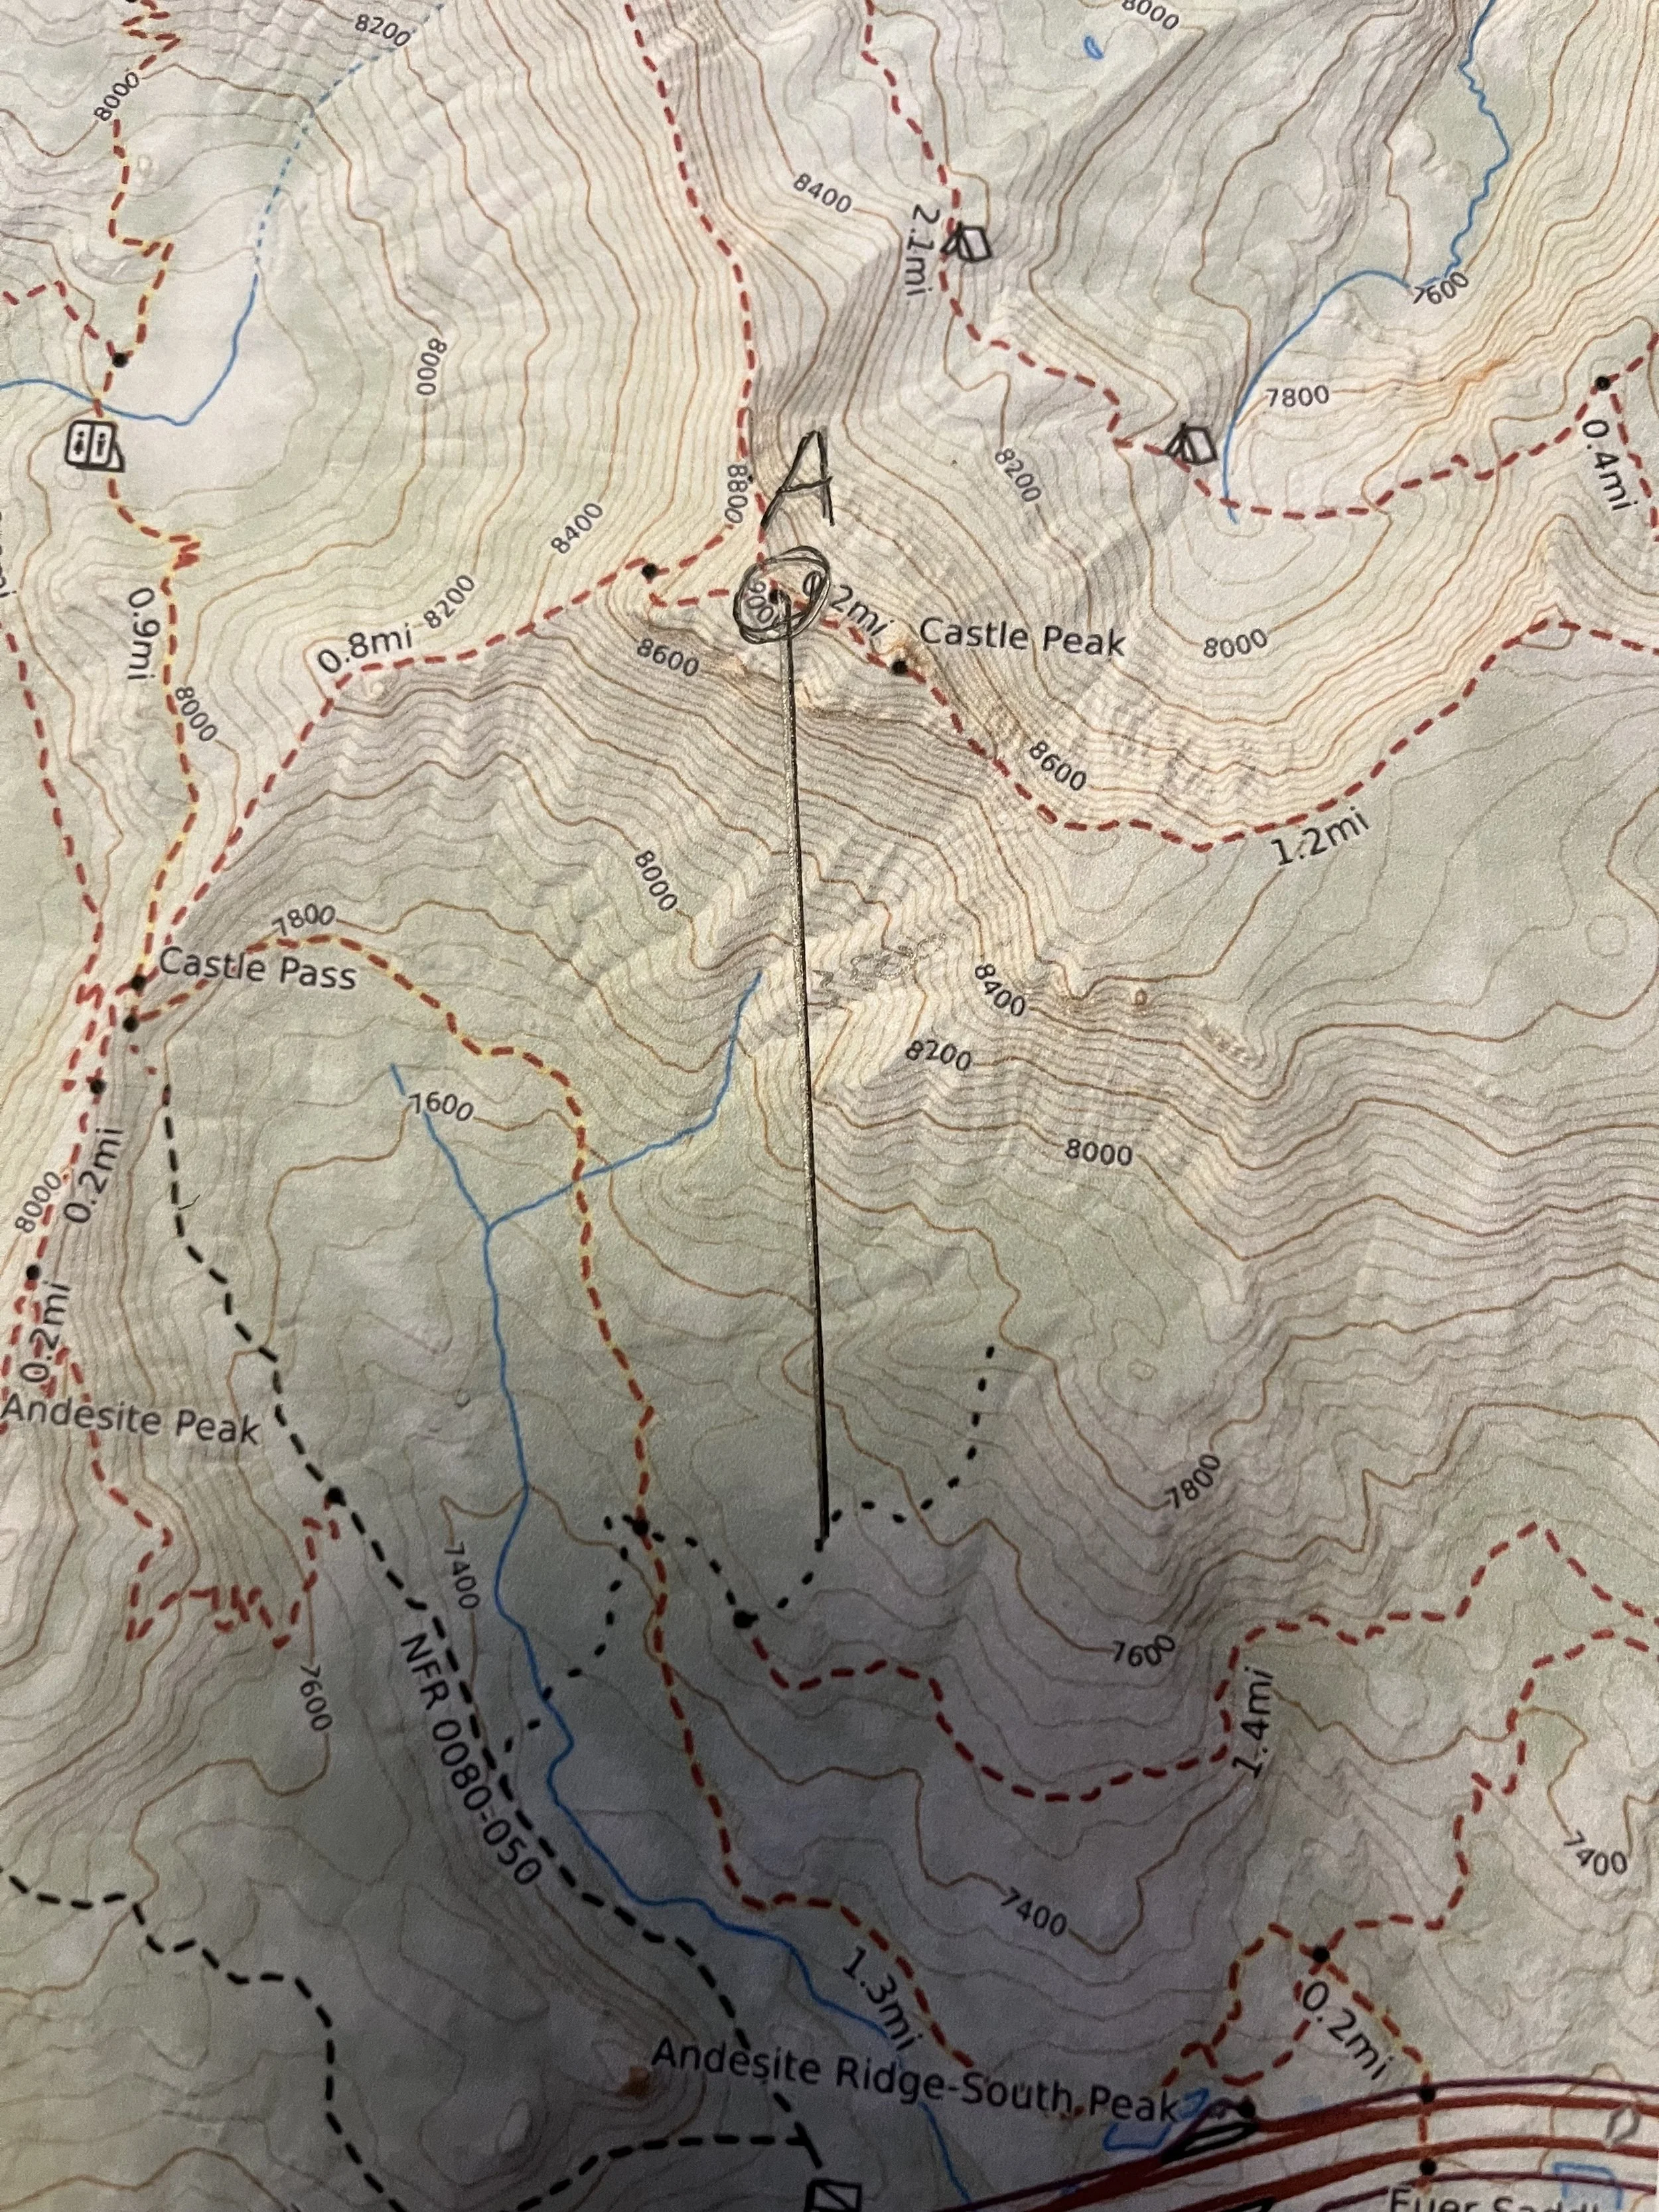
Fig. 8 - The line that I’m somewhere on.

Fig. 9 - Second bearing off of Andesite.
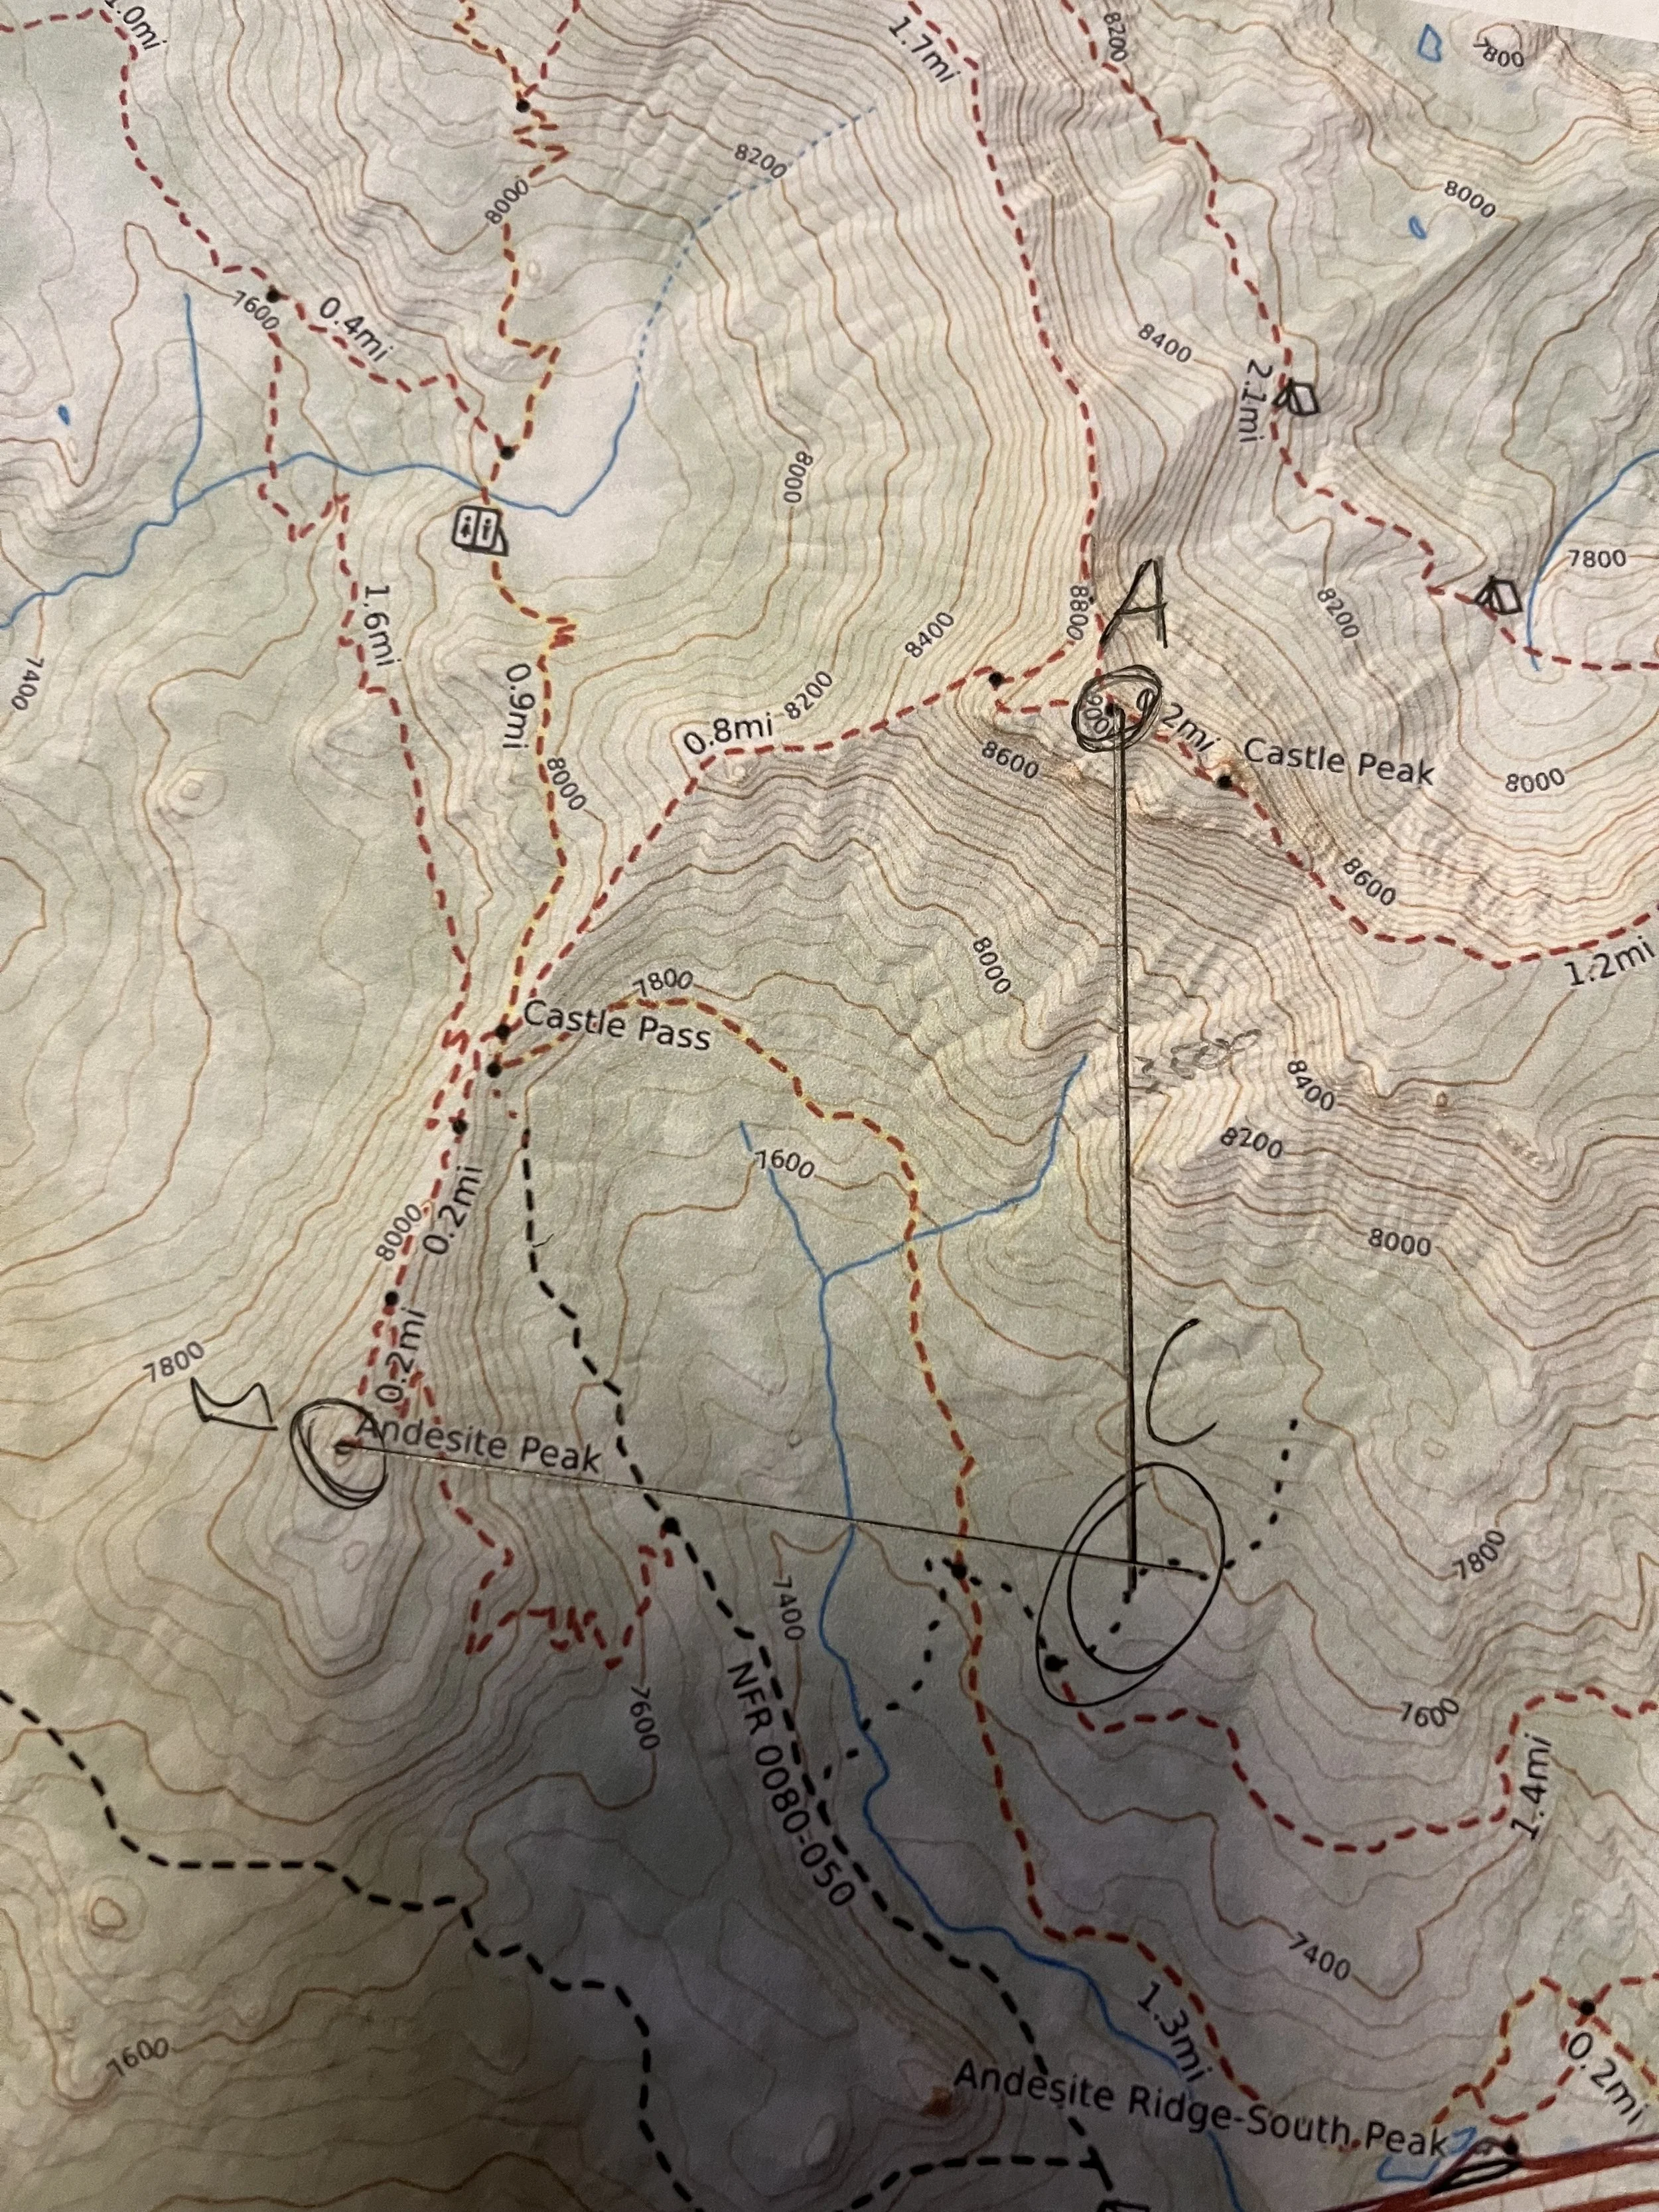
Fig. 10 – Where the two lines intersect is about where I am.
Taking a bearing off of the map: Now that you found where you are in the world by way of triangulating your position, you can use that point where you are to plot a new bearing to get yourself back to the road. Beginning at your position on the map I take a corner of the compass and place it on your spot. Take the other end on the same side of the compass and direct that to the section of road you want to go, most likely the place where your car is parked. Being sure that the direction of travel arrow is pointing in the direction that you want to go, rotate the bezel of the compass around so that the orienting lines are parallel to the edge of the map. This is also a good time to make sure that north on the compass aligns with north on the map! Once the orienting lines are parallel you have your new bearing. Stand up, hold the compass square with your body, and rotate your whole frame until the red needle is in the orienting arrow (red in the shed.) All you need to do now is travel in the same direction as your direction of travel arrow and you are following your bearing back to the car!
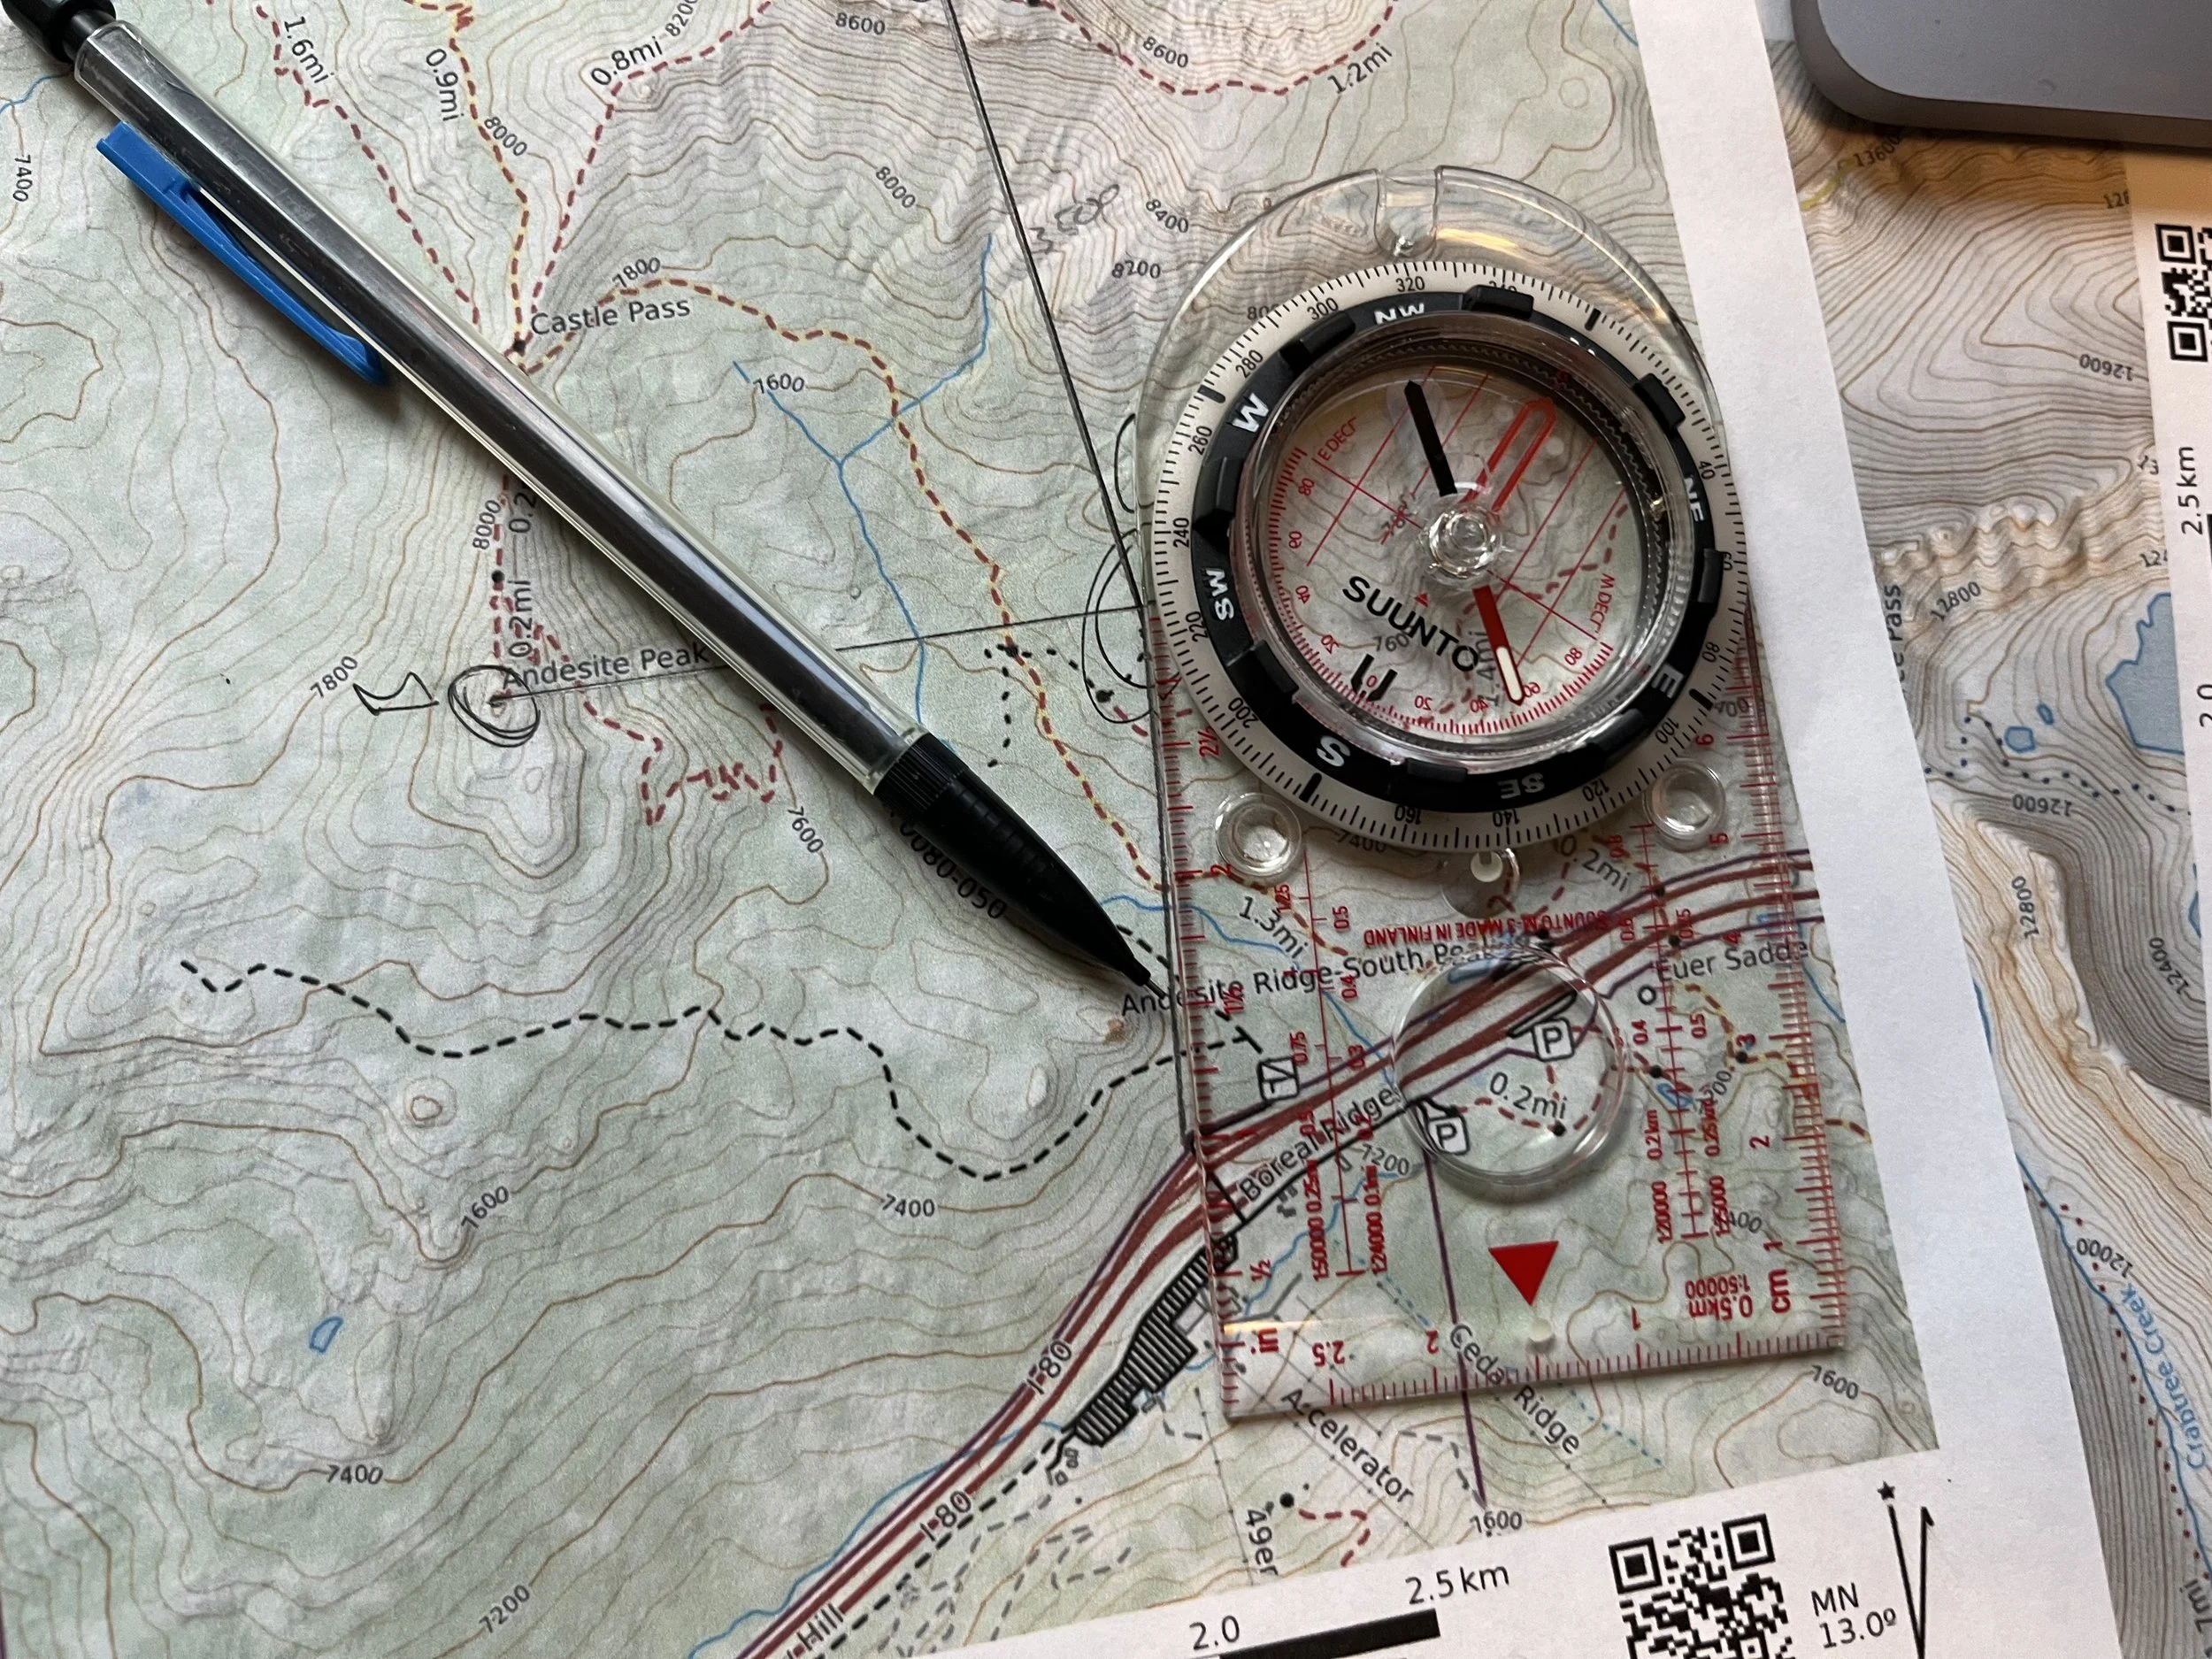
Fig. 11- Lining up one side of the compass with my position and where I want to go.
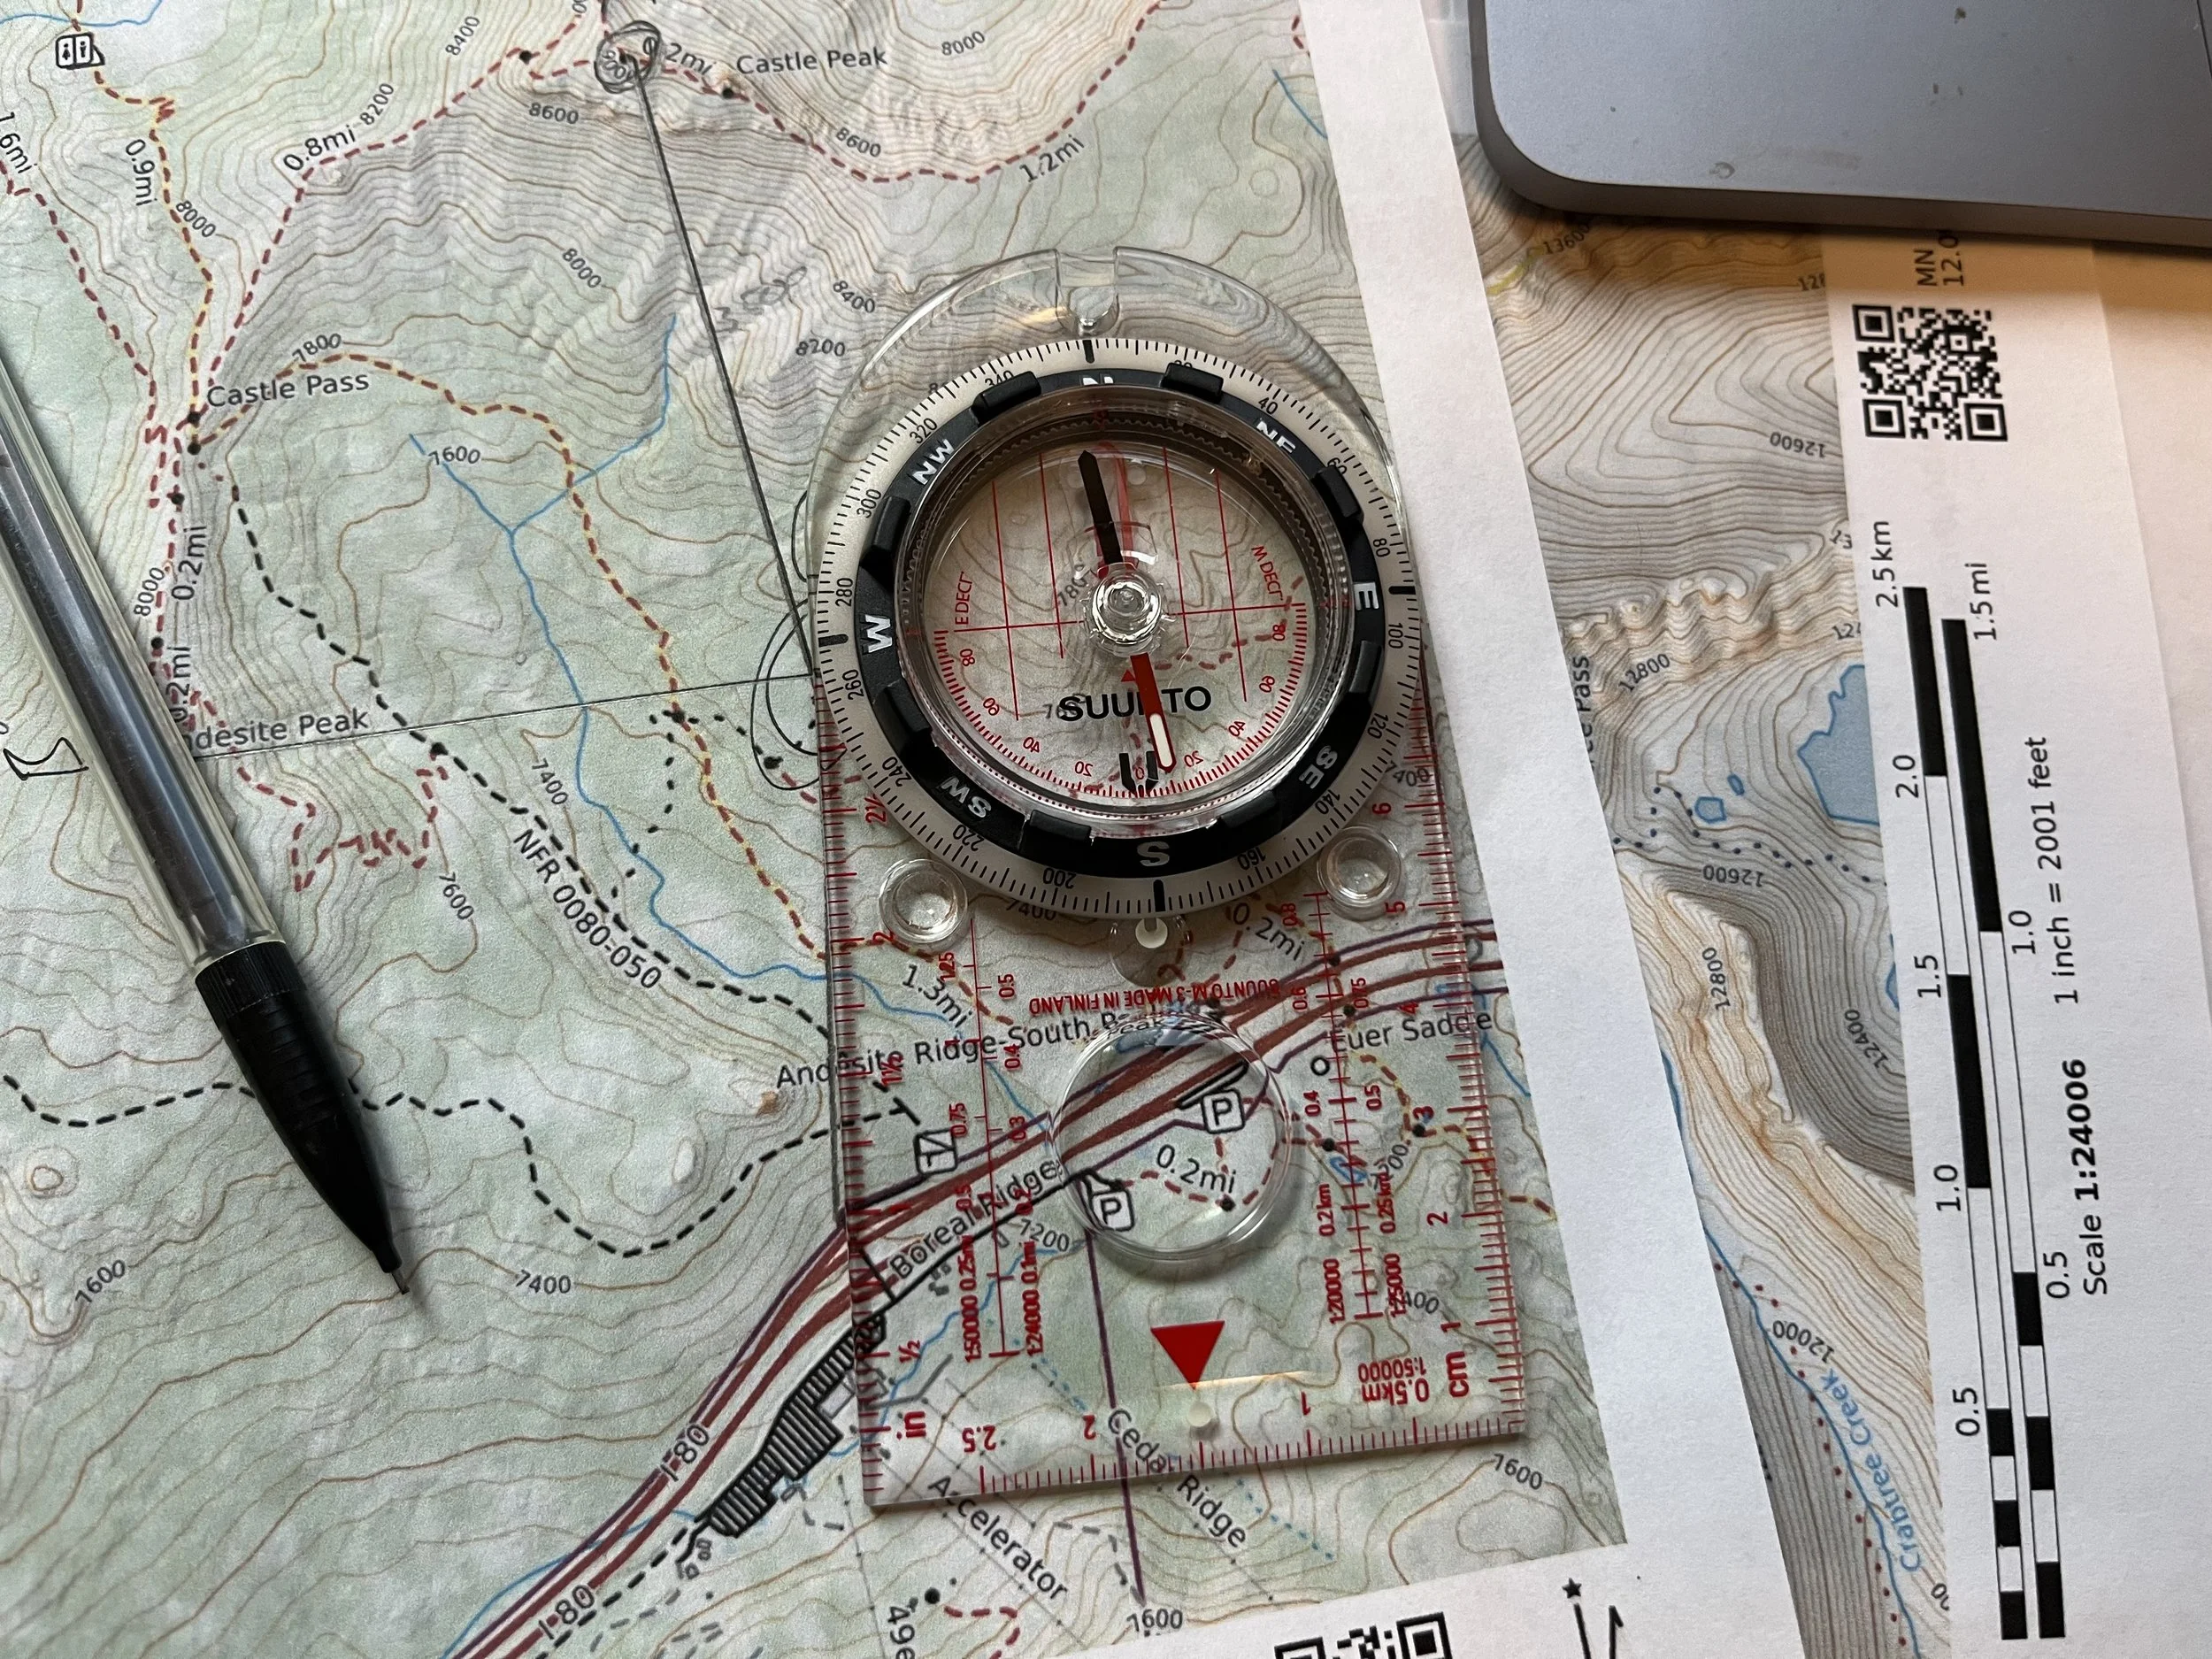
Fig. 12 – Rotating the bezel until the orienting lines are paraelle with the edge of the map.
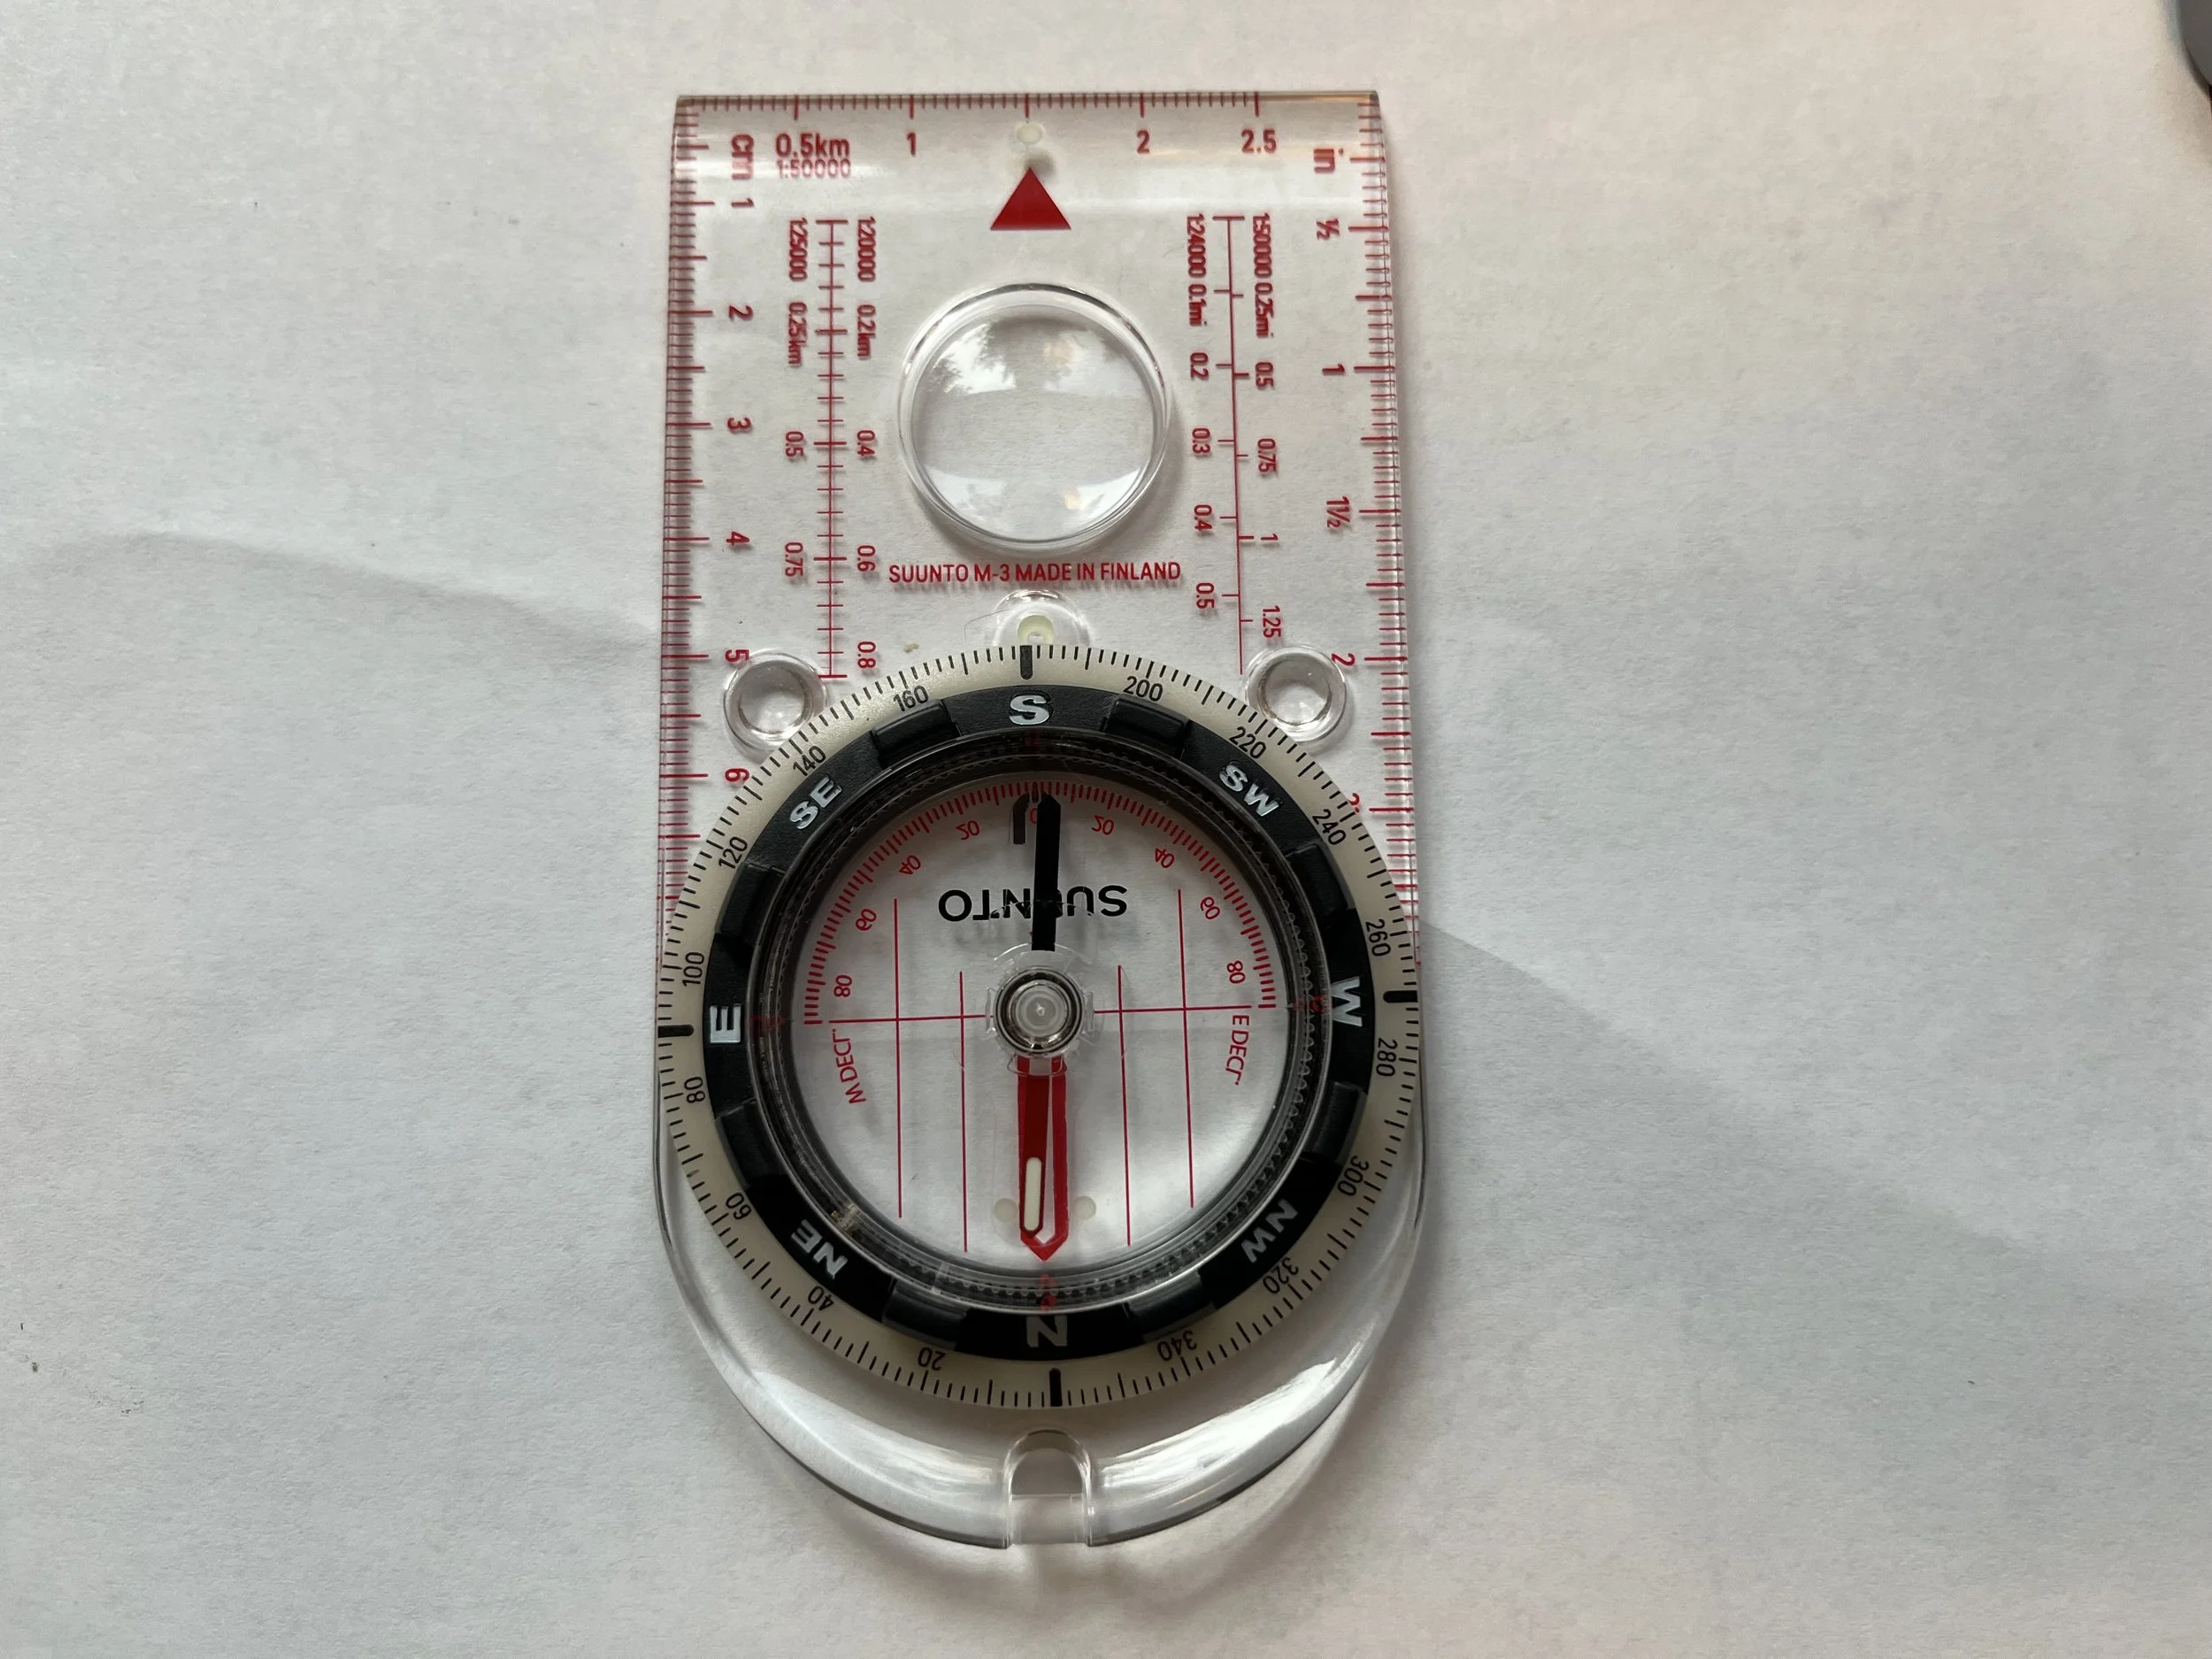
Fig. 13 – Rotate yourself and the compass until red is in the shed and follow the direction of travel arrow to your new bearing.
In the end using your map and compass takes practice to fully master the skills. The best way to start practicing is to go to an area that you already know well, this could be a park, series of trails through the forest, or even your neighborhood. Practice using your map and compass to navigate to a feature that you already know how to get to, in this day and age you can also bring another tool like a gps to check whatever bearings you shoot in the field to see if they are on target. Start small then work yourself into larger and less familiar terrain and soon enough everyone in your group will be looking to you when they get lost!